
Outdoor Wood Smoker: 7 Powerful Tips for Amazing Results 2025
Why Build Your Own Outdoor Wood Smoker
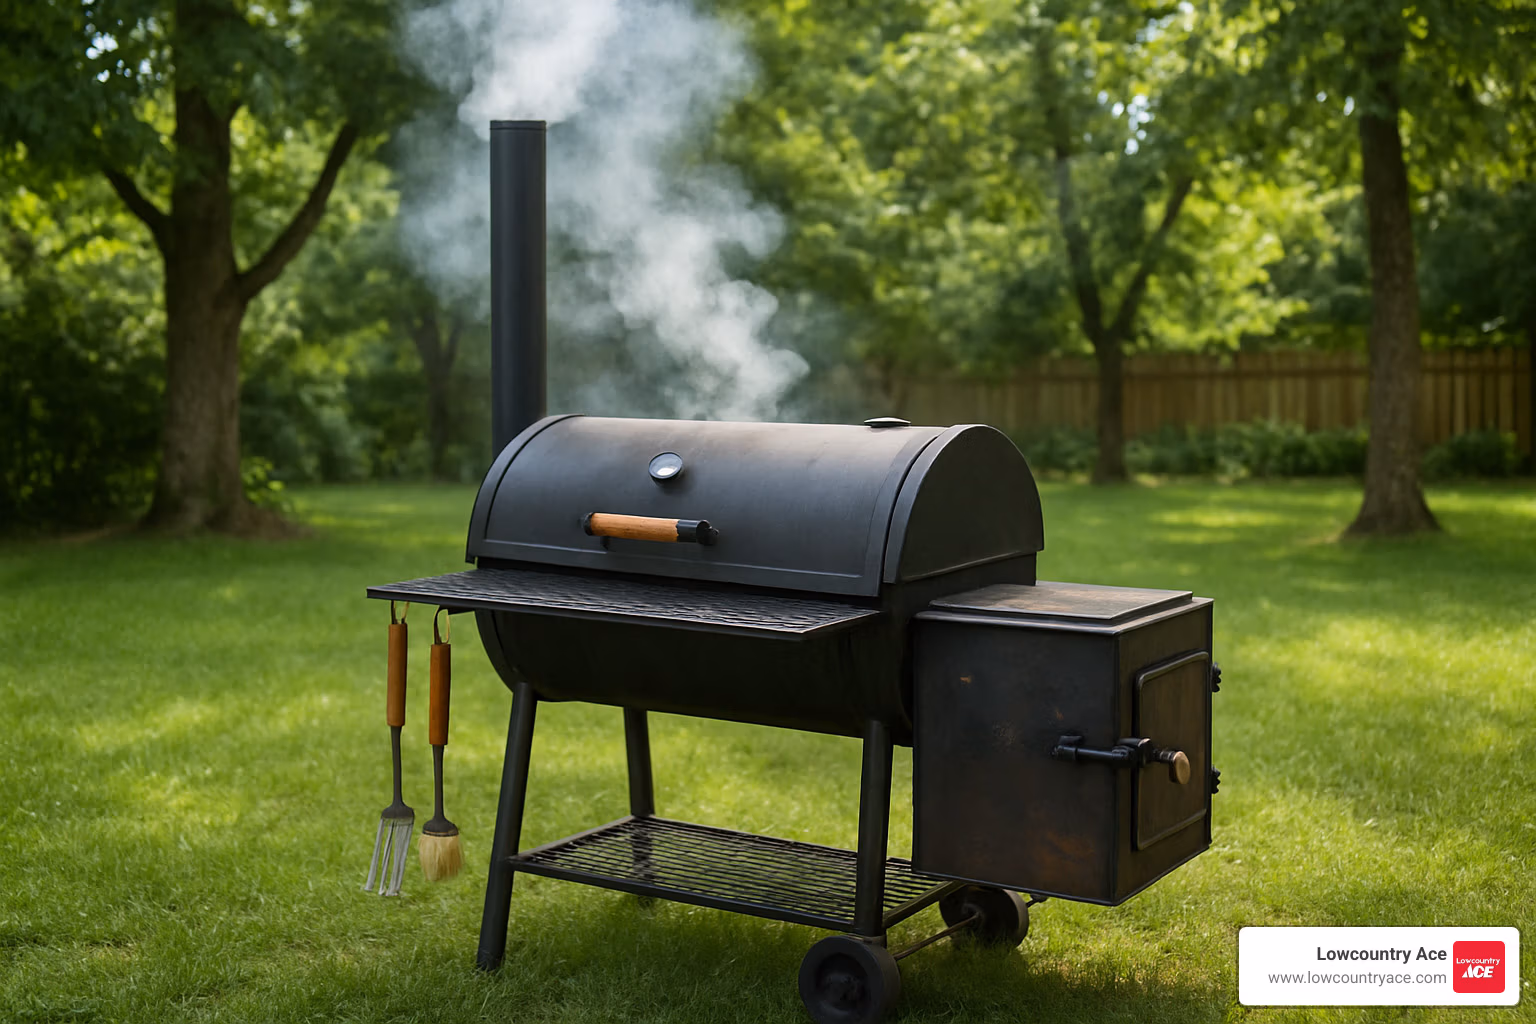
Outdoor wood smokers are the ultimate tool for authentic, flavor-packed barbecue. If you’re looking to build your own smoker, here’s what you need to know:
Quick Guide to Building an Outdoor Wood Smoker:
- Materials needed: Cinder blocks or sheet metal, steel plates, expanded metal grates
- Basic components: Firebox, cooking chamber, chimney, racks, thermometer
- Approximate cost: $250-300 for DIY vs. $700+ for commercial models
- Construction time: 1-2 days for a basic design
- Tools required: Drill, jigsaw, measuring tape, level
There’s something deeply satisfying about smoking food over a wood fire that you just can’t replicate with gas or electric methods. The rich aromas, the perfect smoke ring, and that unmistakable flavor that comes from slowly cooking food over smoldering hardwood – these are the rewards of using an outdoor wood smoker.
But why build one yourself when you can buy one? For starters, a DIY smoker can save you hundreds of dollars. Commercial wood smokers often cost $700 or more, while you can build a quality cinder block pit smoker for around $250. Plus, building your own allows you to customize every aspect to suit your specific needs and available space.
“I have always wanted to try barbecuing food in a block pit smoker… I was not disappointed!” shares one DIY enthusiast who built his own smoker by simply restacking cinder blocks into a functional design.
Whether you’re looking for a weekend project or want to create the ultimate backyard cooking station, building your own outdoor wood smoker combines craftsmanship with culinary art. The process is straightforward enough for most DIY enthusiasts, requiring basic tools and materials that are readily available at your local hardware store.
The helpful team at Lowcountry Ace has guided countless customers through selecting the right materials for their smoker builds, from heat-resistant boards to proper hardware that can withstand high temperatures and outdoor conditions.

Outdoor Wood Smoker Planning & Design
Before you rush off to Lowcountry Ace for supplies, take some time to properly plan your outdoor wood smoker project. Trust me—a well-designed smoker will reward you with years of mouthwatering meals, while a hastily planned one might leave you with unevenly cooked meat and a whole lot of frustration.
The key to success lies in understanding what you need from your smoker. Consider your available space, how often you’ll use it, local building codes, and of course, your budget. Many DIY smokers can be built for $250-500, depending on materials and complexity—a significant savings compared to commercial models.
It’s also worth thinking about the environmental impact. Using sustainable wood sources and designing for efficient fuel consumption not only reduces your carbon footprint but also saves you money in the long run.
Choosing Your Layout
When planning your outdoor wood smoker, you’ll generally be looking at three main designs:
Offset smokers feature a horizontal cooking chamber with the firebox attached to the side. Smoke travels horizontally through your food before exiting through a chimney. This classic design gives you excellent temperature control and keeps direct heat away from your precious brisket. It’s perfect if you have the space and want to cook large quantities.
Vertical cabinet smokers stack the cooking process vertically, with heat at the bottom and multiple cooking racks above. As one smoker enthusiast put it, “Vertical smokers offer energy efficiency and space savings compared to combo grills.” These are ideal if you’re working with limited patio space but still want to smoke a good amount of food.
Drum smokers are simplicity at its finest. Often crafted from repurposed 55-gallon drums, they feature a fire basket at the bottom and a cooking grate above. Some designs allow you to hang meat rather than place it on racks—perfect for those impressive whole chickens or pork shoulders that make your neighbors jealous.
The helpful team at Lowcountry Ace can help you decide which design best suits your needs and skill level.
Sizing for Your Crowd
When it comes to smoker size, honesty is the best policy. Think realistically about:
How many people you’ll typically cook for. A family of four might do just fine with a smaller smoker, but if you’re the neighborhood pitmaster who hosts regular cookouts, you’ll want more capacity.
The types of food you’ll smoke. Different foods need different spaces—ribs need long, flat surfaces, while turkeys need height. If you dream of smoking a whole hog someday, plan accordingly!
Your available space. Be realistic about where your smoker will live. Measure twice, build once.
For a versatile smoker that won’t leave you wanting more, aim for at least 500-700 square inches of cooking surface for a small family. If you plan to entertain, shoot for 1,000+ square inches. And don’t forget about rack spacing—leaving 8-12 inches between racks in a vertical smoker gives you flexibility for larger items.
Draft & Ventilation Math
Here’s where the science of smoking gets interesting. Proper airflow is absolutely crucial for any outdoor wood smoker. Without it, you’ll struggle to maintain consistent temperatures and might end up with food that tastes like an ashtray.
The principle is simple but important: air enters through intake vents, fuels the fire, picks up that delicious smoke, passes over your food, and exits through the chimney. Getting this flow right means paying attention to:
Chimney height: Your chimney should be at least 6 inches taller than the highest point of your cooking chamber. A good rule of thumb: for every foot of cooking chamber length, add about 2-3 inches of chimney height for optimal draft.
Intake vents: Position these at or below fire level. Size matters here—too small, and your fire will starve for oxygen; too large, and temperatures can spike out of control.
Smoke flow: Consider adding baffles or a “smoke spreader” to ensure that smoke distributes evenly throughout your cooking chamber. This prevents hot spots and ensures every bite has that perfect smoky flavor.
As one DIY smoker builder recommends: “Use a small shanty-style flue with standard stove pipe and cap for adjustable venting. This gives you the control you need without complicated engineering.”
If you’re interested in more outdoor cooking options, check out More info about Grills for additional inspiration and supplies available at Lowcountry Ace.
Build-It Guide: From Base to Chimney
Now that you’ve planned your outdoor wood smoker, it’s time to roll up your sleeves and bring it to life. Let’s break down the construction process into steps anyone can follow.
Assembling Your Outdoor Wood Smoker Frame
Your smoker’s frame needs to be sturdy enough to withstand high temperatures and weather conditions for years to come. Here’s how to get started:
For a Cinder Block Smoker:
Find a level spot in your yard and clear away any grass or debris. Arrange your first layer of cinder blocks in a U-shape for the main chamber, with a smaller section for your firebox. Stack additional layers (usually 3-4 blocks high) to reach your desired height. One of the beauties of this design is that you don’t need mortar if you want to be able to take it apart and move it later.
For a Metal Smoker:
Start by cutting sheet metal according to your plans. For a basic offset design, you’ll need side panels (about 42″ tall by 20½” wide), back and bottom panels, material for the top, and door panels for both chambers. Frame these panels with 2×4 lumber or metal angles to add rigidity, then assemble everything using stainless steel screws for wood frames or rivets/welding for all-metal designs.
“I built my smoker with a double-skin construction using plywood and timber battens,” shared one customer who visited Lowcountry Ace for supplies. “The extra layer provides better insulation and makes the whole unit more rigid.”
Any metal surfaces that will touch food should be food-grade steel. The helpful team at Lowcountry Ace can point you toward options that won’t release harmful substances when heated.
| Material | Pros | Cons | Cost Range |
|---|---|---|---|
| Cinder Blocks | Inexpensive, heat-resistant, easy to work with, no special tools needed | Heavy, less portable unless unmortared, limited design flexibility | $50-$100 |
| Sheet Metal | Lightweight, more design options, better heat retention, more professional appearance | Requires more tools and skills, can be more expensive, may need welding | $150-$250 |
Installing the Firebox & Baffles
The firebox is the heart of your outdoor wood smoker, where wood transforms into the heat and smoky goodness that makes BBQ special.
Position your firebox slightly lower than the cooking chamber if possible. This encourages heat and smoke to flow naturally upward into the cooking area. For cinder block smokers, create a barrier between the firebox and cooking chamber using a steel plate with holes. Metal smokers benefit from a baffle plate with adjustable openings.
Heat distribution is crucial for even cooking. Without proper baffles, food nearest the firebox will be overcooked while the far side remains undercooked. A simple perforated metal plate can work wonders for spreading heat and smoke evenly throughout your cooking chamber.
If you’re feeling ambitious, consider a reverse-flow design. This uses a steel plate running the length of the cooking chamber, forcing smoke to travel under the plate to the far end, then back over your food to the chimney. While it requires more work to build, the temperature consistency can’t be beat.
Adding Racks, Gaskets & Finishing Touches
Now for the components that transform your structure into a functional smoker:
For cooking racks, expanded metal or food-grade wire grates work well. Support them with angle iron or metal strips attached to the inside of your cooking chamber. In cinder block designs, the racks can simply rest on the blocks or on metal supports inserted between blocks.
Door seals are essential for temperature control. Standard draft excluders often can’t handle the heat, so look for high-temperature gasket material. One creative builder told us, “I used Velcro loop strips as my smoke seal. They’re surprisingly durable even at high temperatures and create a tight seal.”
Install at least one quality thermometer at grate level—not in the lid where temperatures differ significantly from where your food cooks. Serious BBQ enthusiasts often install multiple thermometers to monitor different areas of the cooking chamber.
For the finishing touches, apply high-temperature paint to metal smokers to prevent rust. Add insulated handles to doors and lids so you won’t burn your hands. Consider wheels or casters for larger smokers to make them easier to move.
Before cooking any food, remember to cure your smoker by running it at around 350°F for several hours. This burns off manufacturing oils or residues and seasons your cooking surfaces.
Operation, Maintenance & Flavor Mastery
Building your outdoor wood smoker is just the beginning of your journey. The real magic happens when you learn to operate it effectively and maintain it properlythats when youll create those mouthwatering, smoky flavors that’ll have neighbors following their noses to your backyard.
Lighting and Tending the Fire
There’s something primal and satisfying about managing a fire in your outdoor wood smoker. It’s not just about heatit’s about creating the perfect environment for flavor:
Start with a chimney starter filled with lump charcoal to create a consistent base of heat without those nasty chemical starters that can leave your brisket tasting like lighter fluid. Once you’ve got those coals glowing, it’s time to add your smoking woodstart small with just 23 chunks and add more as needed.
“What you’re looking for is that thin blue smoke,” as one pitmaster told me. “Thick white smoke means incomplete combustion and will leave your food tasting bitter.” It’s a rookie mistake we’ve all made at least once!
Temperature control is where the real skill comes in. Most BBQ magic happens between 210F and 240F, and your intake vents are your best friends here. Need more heat? Open them up a bit. Running too hot? Close them down. Simple physics, delicious results.
Pro tip: Keep a notebook of your cooks! The helpful team at Lowcountry Ace has heard from countless customers that tracking your vent settings, wood combinations, and results helps you dial in your technique much faster.
Wood Choices & Flavor Profiles
The wood you choose is like selecting the perfect spice for your dishit can completely transform your meat:
Hickory delivers that classic, bacon-like smokiness that works beautifully with pork ribs and shoulders. It’s bold but versatilea great starting point for beginners.
Mesquite packs a powerful punch that stands up to beef and game meats, but use it sparingly or you might feel like you’re chewing on a campfire!
Apple wood offers a gentle, slightly sweet profile that’s perfect for chicken and pork when you want a milder touch.
Cherry not only imparts a fruity sweetness but also helps create that gorgeous mahogany color on your chicken skin.
Oak burns hot and steady, making it an excellent foundation wood that many pitmasters mix with more flavorful options.
The beauty of your DIY outdoor wood smoker is that you can experiment endlessly. Try mixing woodsperhaps oak for heat with a bit of cherry for color and sweetness. Before long, you’ll develop your signature style that friends and family will recognize blindfolded.
For those interested in the science behind wood smoke flavors, research on combustion flavors reveals how different compounds created during the smoking process contribute to the complex taste profiles we love in barbecue. You can dive deeper into the topic by reading the Smoking (cooking) article on Wikipedia), which breaks down the chemistry of smoke and its interaction with food.
Caring for Your Outdoor Wood Smoker
A well-maintained smoker is like a cast iron skilletit gets better with age, developing character and deepening flavors with each use.
Before your first smoke, season your smoker by coating interior metal surfaces with cooking oil and running it at 250300F for several hours. This creates a protective layer that prevents rust and builds your flavor foundation.
After each cook, make sure to clean out those ashes once everything’s cooled down. Leftover ash isn’t just messyit restricts airflow and can actually accelerate metal deterioration through corrosion. Your cooking grates deserve attention toogive them a good brush while they’re still warm (not hot!) after each use.
“My grandfather’s smoker lasted 30 years because he treated it better than his car,” laughed one customer at Lowcountry Ace. That means regular inspection of your door gaskets and seals, replacing them when they show wear to maintain that crucial temperature control.
Even the toughest outdoor wood smoker needs protection from Mother Nature. A good cover is a small investment that pays big dividends in longevity. And don’t forget about your fuelstore wood chunks and charcoal in a dry, covered space to keep them cooking-ready.
With proper care, your outdoor wood smoker becomes more than just a cooking applianceit becomes part of your family’s story. Each smoke session adds another layer of seasoning, another memory of gatherings around good food, and another chance to perfect your craft.
Frequently Asked Questions about Outdoor Wood Smokers
What wood should I burn in my outdoor wood smoker?
The secret to mouthwatering barbecue starts with choosing the right wood for your outdoor wood smoker. Not all woods are created equal – you’ll want to stick with hardwoods and avoid softwoods like pine or spruce, which contain resins that can leave your food tasting like a Christmas tree (and not in a good way!).
The best smoking woods fall into a few flavor categories:
For bold, robust flavors that stand up to beef and game, hickory, oak, and maple are your go-to choices. If you’re cooking more delicate foods like chicken or fish, fruit woods such as apple, cherry, and peach impart milder, sweeter notes that won’t overpower. Nut woods like pecan offer something special – a distinctive character that falls somewhere in between.
“I spent years thinking all wood was the same until I tried smoking a brisket with cherry instead of mesquite,” shares a local pitmaster. “The difference was night and day – much more balanced and less overwhelming.”
Moisture content matters tremendously too. Properly seasoned wood (dried for at least 6 months) with about 15-20% moisture content will give you that thin blue smoke barbecue enthusiasts chase after. Green wood creates billowing white smoke that can leave an acrid taste on your food. The helpful team at Lowcountry Ace can point you toward properly dried smoking woods that are ready for your next cookout.
Don’t be afraid to experiment with wood combinations! Many barbecue champions create signature blends – perhaps a base of oak for steady heat with a handful of cherry for color and sweetness.
How do I keep steady heat in an outdoor wood smoker?
Temperature control is often the trickiest part of mastering an outdoor wood smoker, but with a few insider tips, you’ll be smoking like a pro in no time.
First, consider your fuel strategy. Rather than relying solely on wood for both heat and smoke, many experienced smokers use a mix of charcoal for consistent heat and wood chunks added periodically for flavor. This hybrid approach gives you more predictable temperatures.
Your vents are the thermostats of your smoker. The intake vents at the firebox control oxygen flow – more air means higher heat, less air means lower temperatures. Make tiny adjustments and practice patience; wait 15-20 minutes to see the full effect before tweaking again. It takes time to develop this feel, but soon it becomes second nature.
“I used to constantly fiddle with my smoker vents and kept overcorrecting,” laughs a Charleston resident who’s been smoking meats for years. “Now I make one small adjustment, then go enjoy a cold drink and let the smoker do its thing.”
Adding a water pan to your smoking chamber works wonders for temperature stability. Not only does it act as a heat sink to prevent sudden temperature swings, but it also adds humidity that helps prevent your food from drying out during long smokes.
Wind can be your worst enemy when smoking. Position your outdoor wood smoker in a spot protected from gusts, or create temporary windbreaks on blustery days. Even a moderate breeze can dramatically affect your smoker’s performance.
For truly consistent results, many pitmasters keep detailed cooking logs noting weather conditions, vent positions, and fuel additions. This methodical approach helps you learn from each smoke and replicate your successes.
Is building an outdoor wood smoker cost-effective?
When you’re eyeing those beautiful commercial smokers with their shiny finishes and perfect welds, you might wonder if building your own outdoor wood smoker is worth the effort. From both a financial and satisfaction perspective, the answer is usually a resounding yes.
The numbers tell a compelling story. A basic DIY cinder block smoker might cost you around $250 in materials, while a more elaborate metal design could run $300-500 depending on your material choices and features. Compare that to commercial wood smokers, which typically start at $700 and can easily exceed $2,000 for higher-end models.
“I built my block pit smoker for about $250 using materials from Lowcountry Ace,” shares one satisfied DIY builder. “My neighbor bought a similar-sized commercial smoker for over $800. Three years later, we’re both still smoking great BBQ, but he’s still paying off his purchase while mine was paid for after the first few cookouts.”
Beyond the initial investment, the long-term economics remain favorable for DIY smokers. While homemade versions might require occasional maintenance or minor repairs, the cost of wood fuel remains the same regardless of what type of smoker you’re using. With proper care, a well-built DIY smoker can last just as long as its commercial counterparts.
Perhaps the most valuable aspect isn’t measured in dollars at all – it’s the pride that comes from cooking on equipment you built with your own hands. There’s something deeply satisfying about serving friends and family barbecue from a smoker you designed and constructed yourself.
The helpful team at Lowcountry Ace has guided countless customers through selecting cost-effective materials that don’t compromise on the elements affecting performance and longevity. They can help you balance budget considerations with building a smoker that will serve you well for years to come.
Conclusion
There’s something truly special about building your own outdoor wood smoker from scratch. It’s more than just a weekend project—it’s the beginning of countless backyard gatherings, family traditions, and meals that folks will remember long after the plates are cleared.
Whether you opted for a straightforward cinder block design that came together in a single Saturday or invested several weekends crafting a custom metal smoker, you’ve created something valuable. That unmistakable wood-smoked flavor simply can’t be matched by other cooking methods, and knowing you built the vessel that created it adds an extra layer of satisfaction to every bite.
Don’t worry if your first smoker isn’t perfect—few are! Many backyard pitmasters find themselves tinkering with their designs over time, adding a baffle here or adjusting a vent there as they learn what works best for their cooking style. That’s the beauty of building your own—it grows and evolves alongside your skills.
“My first smoker wasn’t much to look at,” shares a local pitmaster, “but by the third brisket, I was hooked. Five years and three modifications later, that ugly duckling is still turning out the best barbecue in my neighborhood.”
The helpful team at Lowcountry Ace has guided countless Charleston residents through their smoker builds—from helping select the right heat-resistant materials to tracking down those hard-to-find hardware pieces that make all the difference. We’re proud to be part of the vibrant outdoor cooking community here in the Lowcountry.
So gather your materials, invite some friends to lend a hand (with the promise of being guinea pigs for your first smoke), and start on creating your own outdoor wood smoker. The smoky rewards will keep coming for years, and you’ll join a proud tradition of backyard pitmasters who understand that patience, fire, and wood create flavors worth waiting for.
For more information about grills and smokers, check out our guide to grills or stop by our James Island, Folly Beach, or Charleston locations. We’re here to help you build it, smoke it, and savor every delicious moment!
Lowcountry Ace Hardware: Your one-stop shop for home improvement. We offer quality products from trusted brands and expert advice from our experienced staff. Located on James Island, visit us for tools, hardware, fishing gear, power tools, building materials, grills & smokers, electrical and plumbing supplies, and more.


