
Pruning Shears Sharpening: 5 Easy Steps to Success
Pruning shears sharpening is essential for maintaining the health and beauty of your garden. Sharp tools not only make pruning easier but also ensure clean cuts that promote faster healing and reduce the risk of disease. Here’s a quick guide to get you started on keeping your pruning shears in tip-top shape:
- Sharper tools lead to healthier plants: Clean cuts heal faster, helping plants resist disease and pests.
- Safety comes first: Sharp pruning shears are safer to use than dull ones.
- Efficiency: Spend less time struggling with cuts and more time enjoying your garden.
At Lowcountry Ace, we understand the importance of keeping your gardening tools in excellent condition. Our expert team is here to guide you through every step of the process.

Simple pruning shears sharpening word guide:
– knife sharpening cost
– lister clipper blade sharpening
– sharpening hedge trimmers cost
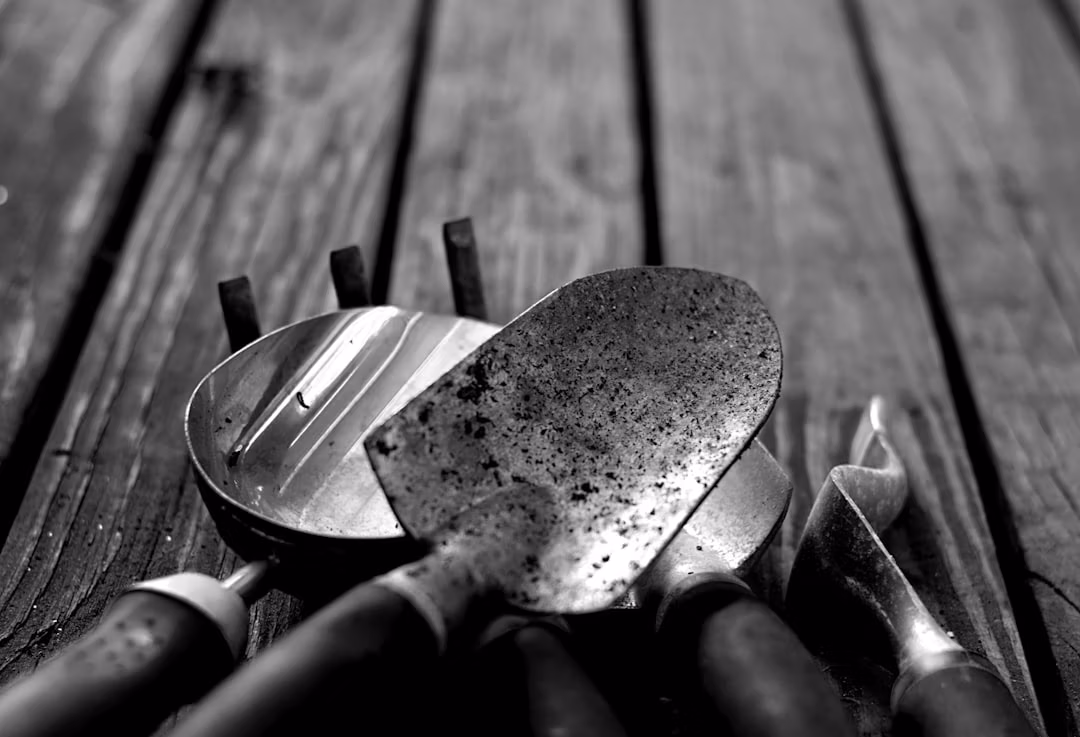
Supplies Needed for Pruning Shears Sharpening
To achieve precise and effective pruning shears sharpening, you’ll need a few essential supplies. These items are easily accessible and will help keep your tools in excellent condition for smooth, clean cuts.
1. Vinegar and Salt
A simple solution of white vinegar and salt is your first step in tackling rust on your pruning shears. Mix vinegar with about 2 tablespoons of salt in a large glass jar or casserole dish. This mixture works wonders in loosening rust from metal surfaces, bringing your tools back to their shiny glory. Soak the rusted parts for 12 to 24 hours, and watch the magic happen.
2. Baking Soda
After removing rust, use baking soda to neutralize the acidity of the vinegar. Immerse your shears in a solution of water and 2 tablespoons of baking soda for about 10 minutes. This step ensures that the vinegar won’t continue to corrode the metal.
3. Steel Wool
For any stubborn rust spots that remain after soaking, steel wool is your best friend. Gently scrub the affected areas to remove any lingering rust. Be thorough but gentle to avoid scratching the metal more than necessary.
4. Carbide Sharpening Tool and Diamond File
To sharpen the blades, you’ll need a carbide sharpening tool or a diamond file. These tools are perfect for refining the beveled edge of the blade. A carbide tool is especially user-friendly, while a diamond file offers precision. Match the sharpener to the angle of the bevel (about 10 to 20 degrees) and use smooth, consistent strokes.
5. Multipurpose Oil
After sharpening, applying a thin coat of multipurpose oil is crucial. This oil not only prevents rust but also ensures that the moving parts of your shears operate smoothly. Rub the oil all over the blades and joints, working the shears back and forth to spread it evenly.
6. Clean Rag
A clean rag is essential for wiping down the shears after each step. Use it to remove any residue from the vinegar and baking soda solutions, and to apply the multipurpose oil. Keeping your tools dry and clean will help extend their lifespan.
With these supplies at hand, you’re well-equipped to maintain your pruning shears and ensure they remain in top-notch condition. The helpful team at Lowcountry Ace is always ready to assist you with any questions or additional supplies you may need.
Step-by-Step Guide to Pruning Shears Sharpening
Keeping your pruning shears in tip-top shape is easier than you might think. Follow these steps to ensure your tools are always ready for action.
Removing Rust from Pruning Shears
Disassemble Pruners
If possible, start by taking your pruning shears apart. This makes it easier to clean and sharpen each component. Take photos during disassembly to remember how everything fits back together.
Clean with Soapy Water
Begin by washing the pruner parts in warm, soapy water. Use a scrubby sponge to remove dirt and grime. Rinse and dry thoroughly.
Vinegar and Salt Solution
For rust removal, submerge the metal parts in a solution of white vinegar and salt. Let them soak for 12 to 24 hours. This will loosen the rust, making it easier to remove.
Steel Wool and Baking Soda Neutralization
After soaking, use steel wool to scrub off any remaining rust. Once clean, dip the parts in a baking soda solution to neutralize the vinegar’s acidity. Let them sit for about 10 minutes, then rinse and dry completely.
Sharpening the Pruning Shears Blade
Carbide Tool and Diamond File
To sharpen the blade, use a carbide sharpening tool or a diamond file. Hold the sharpener at the same angle as the blade’s bevel, typically between 10 to 20 degrees.
Angle of Bevel and Smooth Motion
Draw the tool along the edge of the blade in a smooth, consistent motion. Apply moderate pressure, starting from the base of the blade and moving toward the tip. Repeat this until the blade is sharp.
Remove Burrs
After sharpening, gently run a fine-grit file over the backside of the blade to remove any burrs. This step ensures a clean, sharp edge.
Reassembling and Oiling Pruning Shears
Reassemble the Pruners
Refer to your photos and carefully put the pruners back together. Make sure all parts are secure and aligned correctly.
Lubricate Moving Parts
Apply a thin coat of multipurpose oil to the blades and all moving parts. This helps prevent rust and ensures smooth operation. Work the shears back and forth to distribute the oil evenly.
By following these steps, your pruning shears will be ready for precise and effective use, making your gardening tasks much easier. The helpful team at Lowcountry Ace is always ready to assist if you need further guidance or supplies.
Frequently Asked Questions about Pruning Shears Sharpening
How do you sharpen pruning shears?
Sharpening pruning shears is a straightforward process that can be done with a few tools. A mill file or a scissor-sharpener is commonly used. Start by disassembling the shears if possible, as this makes it easier to access and sharpen the blade.
Place the blade at the correct angle, usually between 20-30 degrees, on the sharpening tool. Using smooth, even strokes, draw the file or sharpener across the blade, following the natural bevel. This ensures a clean, sharp edge. Repeat until the blade feels sharp to the touch.
What angle are garden shears sharpened at?
The angle at which you sharpen garden shears is crucial for maintaining their efficiency and longevity. Garden shears are typically sharpened at an angle between 20 to 30 degrees. This is referred to as the bevel angle. Keeping the correct angle helps preserve the blade’s edge and ensures clean cuts.
Maintaining this angle during sharpening prevents unnecessary wear and extends the life of your shears. Always focus on the beveled edge, as this is where the cutting action takes place.
Is it worth sharpening garden shears?
Absolutely! Sharpening your garden shears is essential for several reasons. First, it prolongs the tool’s longevity, saving you from frequent replacements. Sharp shears make cleaner cuts, which are better for plant health. Clean cuts heal faster and reduce the risk of disease and pest infestations.
Moreover, using sharp shears makes gardening tasks easier and more enjoyable. You’ll find that your pruning is more efficient, allowing you to maintain your garden with less effort. Regular maintenance, including sharpening, is a small investment that pays off in the long run.
Conclusion
Maintaining your pruning shears is not just about keeping them sharp—it’s about ensuring the health of your garden and the longevity of your tools. At Lowcountry Ace, we believe that well-maintained tools lead to a flourishing garden. Regular care, including sharpening, cleaning, and oiling, is essential.
Seasonal care is a smart approach to keep your tools in top shape. As the seasons change, so do your gardening needs. In the fall, before storing your tools away for winter, clean and sharpen your pruning shears. This ensures they’re ready for action when spring arrives.
Maintenance tips are simple but effective. Always store your shears in a dry place, away from moisture that causes rust. Use multi-purpose oil on the blades and moving parts to prevent corrosion. Disinfecting your shears after use helps avoid spreading plant diseases.
For those in the James Island and Folly Beach areas, Lowcountry Ace offers a range of products and expert advice to support your garden tool maintenance. Whether you need the right oil, a sharpening stone, or just some friendly advice, our helpful team is here to assist you.
Taking a little time to care for your tools now means they’ll be ready and reliable when you need them. For more detailed guidance and supplies, visit our blade sharpening services page. Let’s keep your garden tools in peak condition together!
Lowcountry Ace Hardware: Your one-stop shop for home improvement. We offer quality products from trusted brands and expert advice from our experienced staff. Located on James Island, visit us for tools, hardware, fishing gear, power tools, building materials, grills & smokers, electrical and plumbing supplies, and more.


